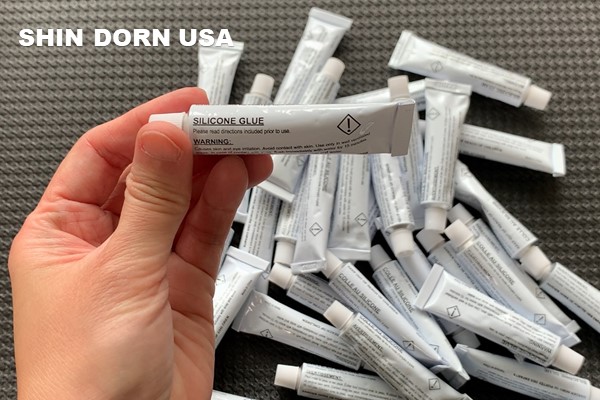
Silicone sealant is a staple in the world of home improvement, known for its versatility, durability, and waterproofing capabilities. While large cartridges are common, small tubes of silicone sealant, typically ranging from 3 grams to 30 grams and filled in small aluminum squeeze tubes, offer distinct advantages. These compact containers are perfect for precision tasks, quick fixes, and small-scale projects. Now, let’s explore the benefits of using small tubes of silicone sealant for various home improvement projects and provide a step-by-step guide on how to apply it properly.
Projects Using Small Tubes of Silicone Sealant
1. Minor Bathroom Repairs: Fix small cracks in tiles, seal around the sink, and repair minor leaks in the shower.
2. Window Insulation: Seal gaps and cracks around window frames to improve energy efficiency and prevent drafts.
3. Kitchen Fixes: Re-seal the edges of countertops, sinks, and backsplashes to prevent water damage and mold growth.
4. Craft and Hobby Projects: Create and repair items such as picture frames, DIY decorations, and small household items.
5. Electronics Waterproofing: Protect sensitive electronic components from moisture by sealing joints and openings.
6. Automotive Repairs: Use in small areas of the car that need sealing, such as light covers or minor body repairs.
7. Outdoor Projects: Seal joints in outdoor furniture, garden decorations, and minor repairs to gutters and downspouts.
How to Properly Apply Small Tubes of Silicone Sealant
Applying silicone sealant may seem straightforward, but following the correct steps ensures a clean, durable, and effective seal.
Materials Needed
– Small tube of silicone sealant
– Utility knife or scissors
– Masking tape
– Rubbing alcohol or acetone
– Clean cloth
– Caulking tool or a plastic spoon
– Gloves
Application Guide
1. Prepare the Surface
Ensure the area to be sealed is clean, dry, and free of dust, grease, or old sealant. Use rubbing alcohol or acetone on a clean cloth to wipe down the surface. Allow it to dry completely.
2. Mask the Area (Optional)
If you’re sealing around edges or joints, use masking tape to create clean lines and protect adjacent surfaces from excess sealant.
3. Apply the Sealant
Put on gloves to protect your hands. Hold the tube at a slight angle and gently squeeze it to apply a continuous bead of sealant along the joint or crack. Move steadily to ensure an even application. For narrow gaps, apply a thin bead; for wider gaps, apply a thicker bead.
4. Smooth the Sealant
Use a caulking tool or a plastic spoon to smooth the bead of sealant, pressing it into the joint and ensuring good adhesion. This also helps to create a professional-looking finish. Wetting the tool or spoon with soapy water can help achieve a smoother finish.
5. Remove the Masking Tape
If you used masking tape, remove it carefully while the sealant is still wet. This will leave clean, sharp edges.
6. Allow to Cure
Follow the manufacturer’s instructions for curing time, which is typically 24 hours. Ensure the area is undisturbed during this period.
7. Clean Up
Clean any excess sealant immediately using a cloth and rubbing alcohol or acetone. Dispose of the tube properly once it’s empty.
Let Small Tube Silicone Help
Small tubes of silicone sealant are a convenient tool for a wide range of home improvement projects. Their portability, precision, and ease of use make them ideal for minor repairs and detailed work. By following the proper application steps, you can ensure a durable and professional finish every time.
Shin Dorn offers small tubes of silicone sealant. Popular sizes are 7 gram, 10 gram, 15 gram and 20 gram. Custom branded packaging services. Please feel free to contact us for free samples and updated pricing: sales@shindorn.com